DIY Guide: How to Install Heavy-Duty Wall Shelves at Home Step-by-Step

Installing wall shelves is one of the easiest and most rewarding DIY (Do-It-Yourself) home improvement projects. Whether you want to clear countertop clutter in your kitchen, display indoor plants, or create a stylish book rack in your living room, floating wall shelves give you maximum storage with zero floor space usage.
However, many homeowners worry about shelves sagging, loosening, or falling off the wall due to poor installation or weak brackets.
In this step-by-step guide, you will learn how to install heavy-duty wall shelf brackets safely and securely using basic household tools.
Tools & Materials You Will Need
Before starting, gather the following items:
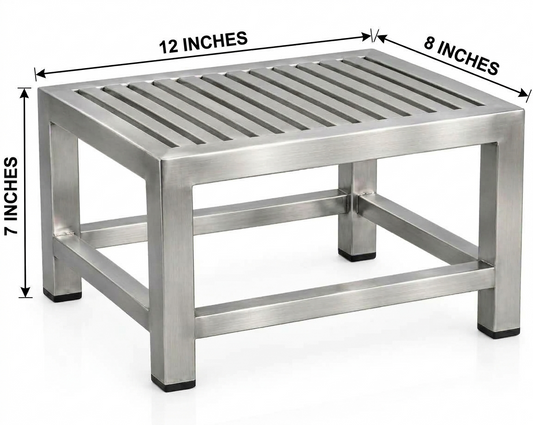
- Heavy-Duty Stainless Steel Shelf Brackets (e.g., 12x7 inch size)
- Wooden, glass, or acrylic shelf board
- Electric drill machine & wall drill bit (6mm or 8mm depending on anchors)
- Plastic wall plugs (Gitti / Rawl plugs) & steel screws
- Spirit level (or smartphone spirit level app)
- Pencil for marking
- Measuring tape
Step 1: Decide the Height and Mark the Spot
- Choose the wall location where you want your shelf. Make sure there are no hidden electrical pipes or water lines directly behind that spot.
- Hold your wooden or glass shelf board against the wall at your desired height.
- Use a measuring tape to ensure the shelf is centered and at an easy-to-reach height.
Step 2: Use a Spirit Level for Perfect Alignment
Nobody likes a crooked shelf!
- Place one shelf bracket against the wall and use a spirit level (or bubble level app) to make sure it is perfectly straight vertically.
- Mark the screw hole points on the wall through the bracket using a sharp pencil.
- Measure the distance between the two bracket locations (usually 1.5 to 2 feet apart depending on shelf length) and mark the second bracket location using the spirit level.
Step 3: Drill Holes and Insert Wall Plugs
- Select a drill bit that matches the size of your plastic wall anchors (gitti).
- Drill straight into the marked pencil points on the wall to the exact depth of the wall plug.
- Gently tap the plastic wall plugs into the drilled holes using a hammer until they sit flush against the wall surface.
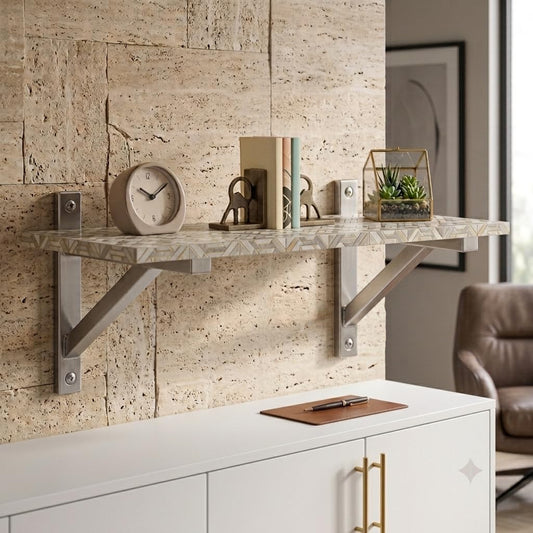
Crucial Pro-Tip for Maximum Weight Capacity: Always use strong, welded stainless steel shelf brackets. Flimsy plastic brackets or thin metal clips will bend under heavy cookware, books, or appliances. Explore Heavy-Duty Stainless Steel Wall Brackets
Step 4: Mount the Steel Brackets to the Wall
- Align the screw holes of your stainless steel bracket with the inserted wall plugs.
- Drive the steel screws tightly into the wall plugs using a screwdriver or drill driver.
- Give the mounted bracket a firm tug to ensure there is zero movement or wobbling.
Step 5: Secure the Shelf Board onto the Brackets
- Place your wooden or metal shelf board flat on top of the mounted brackets.
- Check again with a spirit level to ensure the board is 100% horizontal.
- Screw short wood screws from underneath the bracket into the bottom of your shelf board. This locks the board in place and prevents it from tipping or sliding forward when items are placed on it.
Common Installation Mistakes to Avoid
| Mistake | Why It's Dangerous | How to Fix It |
|---|---|---|
| Guessing alignment by eye | Items will slide off a crooked shelf | Always use a spirit level tool |
| Using plastic wall holders | Weak hold; shelf falls under weight | Use heavy-duty metal/steel brackets |
| Placing brackets too far apart | The middle of the wooden board will sag | Keep brackets 1.5 to 2.5 feet apart |
| Skipping bottom screws | The board can slip off when bumped | Always screw the board onto the bracket |
Final Thoughts: Enjoy Your Sturdy DIY Wall Shelf!
Congratulations! You have successfully installed a heavy-duty, modern floating wall shelf that can easily hold kitchen appliances, heavy books, or potted plants for years to come.
Need High-Strength Brackets for Your Next Wall Project?
Check out our precision-engineered Stainless Steel Wall Shelf Brackets built with superior load capacity and rust-free finish.